


Customize your Citrix StoreFront 3 website.
More from the Lab!
- Building a Dual-Xeon Citrix Lab: Part 1 – Considerations
- Building a Dual-Xeon Citrix Lab: Part 2 – Hardware
- Building a Dual-Xeon Citrix Lab: Part 3 – Windows and Hyper-V installation
- Lab: Part 4 – Hyper-V Networking
- Lab: Part 5 – NetScaler 11 Architecture and Installation
- Lab: Part 6 – Configure NetScaler 11 High Availability (HA Pair)
- Lab: Part 7 – Upgrade NetScalers in HA
- Lab: Part 8 – Save, Backup and Restore NetScaler 11 configuration
- Lab: Part 9 – Install Microsoft SQL Server 2014 (Dedicated)
- Lab: Part 10 – Citrix Licensing demystified
- Lab: Part 11 – Install XenDesktop 7.6
- Lab: Part 12 – Setup NetScaler 11 Clustering (TriScale)
- Lab: Part 13 – Configure Published Applications with XenDesktop 7.6
- Lab: Part 14 – Citrix StoreFront 3.x
- Lab: Part 15 – Configure SSL in StoreFront
- Lab: Part 16 – StoreFront load balancing with NetScaler (Internal)
- Lab: Part 17 – Optimize and secure StoreFront load balancing with NetScaler (Internal)
- Lab: Part 18 – Secure LDAP (LDAPS) load balancing with Citrix NetScaler 11
- Lab: Part 19 – Configure Active Directory authentication(LDAP) with Citrix NetScaler 11
- Lab: Part 20 – RDP Proxy with NetScaler Unified Gateway 11
- Lab: Part 21 – Secure SSH Authentication with NetScaler (public-private key pair)
- Lab: Part 22 – Ultimate StoreFront 3 customization guide
- Lab: Part 23 – Securing Citrix StoreFront DMZ deployment
- Lab: Part 25 – Upgrade to Citrix StoreFront 3.7
- Lab: Part 26 – Install/Upgrade Citrix XenDesktop 7.11
- Lab: Part 27 – Getting started with Microsoft Azure
- Lab: Part 28 – Getting started with Citrix Cloud
- Lab: Part 29 – Configure XenDesktop And XenApp Service with Microsoft Azure and Citrix Cloud
- Lab: Part 30 – Configure Identity and Access Management in Citrix Cloud with Microsoft Azure AD
- Lab: Part 31 – Configure NetScaler Gateway Service for XenApp and XenDesktop Service in Citrix Cloud
- Lab: Part 32 – Configure MCS with XenDesktop and XenApp Service in Citrix Cloud
- Lab: Part 33 – Configure Azure Quick Deploy with XenDesktop and XenApp Service in Citrix Cloud
- Lab: Part 34 – Configure Site Aggregation for Citrix Workspace in Citrix Cloud with XenDesktop 7.x located on-premises
- Lab: Part 35 – Configure a Hybrid NetScaler MA Service environment in Citrix Cloud
- Lab: Part 36 – Configure ShareFile in Citrix Cloud with StorageZones on-premises
- Lab: Part 37 – Upgrade NetScaler HA pair with NetScaler MA Service in Citrix Cloud
- Lab: Part 38 – How to Configure Full VPN Setup with Citrix NetScaler in CLI
- Lab: Part 39 – Configure Multi-Factor Authentication with Azure MFA Service and Citrix Workspace
- Lab: Part 40 – Getting Started with Citrix App Layering
- Lab: Part 41 – Configure Citrix App Layering
- Lab: Part 42 – OS Layer with Citrix App Layering
- Lab: Part 43 – Platform Layer with Citrix App Layering
- Lab: Part 44 – Application Layers with Citrix App Layering
- Lab: Part 45 – Layered Image Deployment with Citrix App Layering
- Lab: Part 46 – Elastic deployment with Citrix App Layering
- Lab: Part 47 – User Layers with Citrix App Layering
- Lab: Part 48 – Windows 10 and PVS with Citrix App Layering
Getting Started
- Only do changes in the configuration files located in the StoreFront custom folder. This will help you during StoreFront upgrades as the content from the custom folder will remain.
Default location:- Javascript -> C:\inetpub\wwwroot\Citrix\<StoreName>Web\custom\script.js
- CSS -> C:\inetpub\wwwroot\Citrix\<StoreName>Web\custom\style.css
- Copy new images in C:\inetpub\wwwroot\Citrix\<StoreName>Web\custom\
- Progagate your changes to all secondary servers using the StoreFront propagation feature or copy the content of the custom folder to all the servers.
- Troubleshooting:
- Display alerts: http://<StoreFrontURL/Citrix/<StoreName>Web/#-errors
- Enable debug: http://<StoreFrontURL/Citrix/<StoreName>Web/#-debug
- Disable customizations: http://<StoreFrontURL/Citrix/<StoreName>Web/#-nocustom
- Enable tracing: http://<StoreFrontURL/Citrix/<StoreName>Web/#-tr
- Enable tracing with no customizations: http://<StoreFrontURL/Citrix/<StoreName>Web/#-tr-nocustom
Customizations
Global
Rename StoreFront webpage
Code
- Javascript
Go to C:\inetpub\wwwroot\Citrix\<StoreName>Web\custom and open strings.en.js.
|
1 2 3 4 5 6 |
(function ($) { $.localization.customStringBundle("en", { AppStore: "Citrix Applications", Example2: "This is another example" }); })(jQuery); |
Before
After

Rename others items
Below is a list of all items available in StoreFront 3:
|
1 2 3 4 5 6 7 8 9 10 11 12 13 14 15 16 17 18 19 20 21 22 23 24 25 26 27 28 29 30 31 32 33 34 35 36 37 38 39 40 41 42 43 44 45 46 47 48 49 50 51 52 53 54 55 56 57 58 59 60 61 62 63 64 65 66 67 68 69 70 71 72 73 74 75 76 77 78 79 80 81 82 83 84 85 86 87 88 89 90 91 92 93 94 95 96 97 98 99 100 101 102 103 104 105 106 107 108 109 110 111 112 113 114 115 116 117 118 119 120 121 122 123 124 125 126 127 128 129 130 131 132 133 134 135 136 137 138 139 140 141 142 143 144 145 146 147 148 149 150 151 152 153 154 155 156 157 158 159 160 161 162 163 164 165 166 167 168 169 170 171 172 173 174 175 176 177 178 179 180 181 182 183 184 185 186 187 188 189 190 191 192 193 194 195 196 197 198 199 200 201 202 203 204 205 206 207 208 209 210 211 212 213 214 215 216 217 218 219 220 221 222 223 224 225 226 227 228 229 230 231 232 233 234 235 236 237 238 239 240 241 |
About: "About", AcceptTermsMessage: "Please accept the terms of the licensing agreement before installing Citrix Receiver.", AccessGatewayChangePasswordWarning: "Logoff is required after a successful password change. You will need to log on again to use your apps.", ActivateCitrixPlugin: "Activate the Citrix plug-in", ActivateReceiver: "Activate...", ActivateReceiverToolTip: "Activate Citrix Receiver on your desktop", Add: "Add", AddAll: "Add All", Added: "Added", AddedToFavorites: "Remove", AddFavoritesTitle: "Add Favorites", AddFavoritesDescription: "Go to Desktops or Apps, click on Details next to your choice and then select Add to Favorites.", AddFavoritesDescriptionDesktopsOnly: "Go to Desktops, click on Details next to your choice and then select Add to Favorites.", AddFavoritesDescriptionAppsOnly: "Go to Apps, click on Details next to your choice and then select Add to Favorites.", AddFavoritesDescriptionPhone: "Under the menu, go to Desktops or Apps, click on Details next to your choice and then select Add to Favorites.", AddFavoritesDescriptionPhoneDesktopsOnly: "Under the menu, go to Desktops, click on Details next to your choice and then select Add to Favorites.", AddFavoritesDescriptionPhoneAppsOnly: "Under the menu, go to Apps, click on Details next to your choice and then select Add to Favorites.", AddToFavorites: "Add To Favorites", AllApps: "Apps", AllAppsTitle: "All Apps", AllAppsForToolbar: "All", AllowPluginToRun: "Allow this website to run the Citrix plug-in to access apps.", AllRightsReserved: "All rights reserved.", AlreadyInstalled: "Already installed", AppDetailsUnavailable: "App details unavailable", AppInMaintenance: "\"{0}\" is temporarily unavailable due to planned maintenance.", AppRequestPendingApprovalCannotStart: "\"{0}\" is pending approval and cannot be started.", Approved: "Approved", AppStore: "Citrix Receiver", AuthFailureSmartcard: "Cannot log on using smart card.", AuthFailurePassthrough: "Cannot log on using the account you used to sign on to the computer.", Available: "Available", Back: "Back", BackToAppsAndDesktops: "Back to Apps and Desktops", BlankFolder: "[blank category]", Bundles: "Featured App Groups", Cancel: "Cancel", CancelRequest: "Cancel Request", CannotAddApp: "Cannot add app \"{0}\".", CannotAddAppTitle: "Cannot Add App", CannotCompleteYourRequest: "Cannot complete your request.", CannotDetectReceiverInstallAvailable: "We couldn't detect Citrix Receiver. Do you want to download and install it?", CannotGetYourAppsFromStore: "Cannot get your apps from the store.", CannotRemoveApp: "Cannot remove app \"{0}\".", CannotRemoveAppTitle: "Cannot Remove App", CannotMoveApp: "Cannot rearrange apps, as the server is currently unavailable.", CannotStartApp: "Cannot start app \"{0}\".", CannotStartDesktop: "Cannot start desktop \"{0}\".", CannotStartDesktopSuggestRestart: "Cannot start desktop \"{0}\". Try restarting it.", Categories: "Categories", ChangeClient: "Change Citrix Receiver...", ChangePassword: "Change password...", Check: "Check", CheckingForUpgrade: "We're checking now for an upgrade.", CheckForUpgrade: "Would you like to check for an upgrade for Citrix Receiver?", ChromeAppOriginMismatch: "Please contact your IT department with this information: You must whitelist the ID of Citrix Receiver in StoreFront.", ChromePluginHelperMessage: "Please allow the Citrix plug-in to run on this website to access apps. For more information refer to the Citrix Knowledge Center article {0}.", CitrixCopyright: "\u00a9 2016 Citrix Systems, Inc.", CitrixLicenseAgreement: "Citrix license agreement", ClearSearch: "Clear Search", ClickContinue: "click <strong>Continue</strong>.", ClickInstall: "Install Citrix Receiver to access your applications", ClickLogOnToContinue: "Click Log On to continue.", ClickUpgrade: "Click install to upgrade Citrix Receiver", Close: "Close", CloseYourBrowserToEndSession: "Please close your browser to log off.", CloseYourBrowserToProtectAccount: "Please close your browser to protect your account.", Connect: "Connect", Continue: "Continue", CookiesAreDisabledBody: "Please enable cookies in your browser before using this version of Citrix Receiver", CookiesAreDisabledTitle: "Cookies Disabled", Denied: "Denied", DesktopInMaintenance: "The desktop \"{0}\" is temporarily unavailable due to planned maintenance.", DesktopRestartWarningText: "Restarting your desktop may solve the problem, but you will lose any unsaved work.", DesktopRestartWarningTitle: "Do you want to restart desktop \"{0}\"?", Desktops: "Desktops", DetectAgain: "Detect again", Details: "Details", DetectClient: "Detect client...", DetectReceiver: "Detect Receiver", Disconnect: "Disconnect", DisplayInFramesNotAllowed: "This site has been loaded within another web page. This page will be refreshed to reload the site.", DoYouWantToStartApp: "Do you want to start \"{0}\"?", Download: "Download", DownloadAgain: "Download again", DownloadReceiver: "Download Citrix Receiver...", DownloadingReceiver: "Downloading Citrix Receiver...", Faq: "FAQ", Featured: "Featured", Folders: "Folders", ForFullExperience: "For the best experience, use the full set of features bundled with {0}. Click Detect Receiver to get started.", GoBackToChoices: "Go back to choices", Help: "Help", IAgreeWith: "I agree with the", IfAlreadyInstalled: "If Citrix Receiver is detected, you will see a window in a few seconds. Please choose {0}.", IfNoWindowAlreadyInstalled: "If no window appears, select {0}.", IfNoWindowDetectAgain: "If no window appears, click {0}.", IfNoWindowOptions: "If no window appears, select from the options below.", IfWasInstalled: "If Citrix Receiver was installed successfully, your browser will show a window in a few seconds. Please choose {0}.", InfoBarSecurityInformation: "Allowing the ActiveX control to run will install software on your computer.", InProgress: "In Progress", Install: "Install", InstallationBegins: "Please wait while the download process begins.", InstallReceiver: "Install Citrix Receiver...", InstallWhenDownloadComplete: "Install Citrix Receiver on your machine when the download is complete. Once you've installed Citrix Receiver, return here and click {0}.", JustAMomentDetecting: "Just a moment, we're detecting if Citrix Receiver is already installed.", LaunchApplication: "Launch Application", Less: "Less", LicenseAgreementContentCode: "CTX_code EP_T_A124358", LicenseAgreementContentText: "Use of this component is subject to the Citrix license or terms of service covering the Citrix product(s) or service(s) with which you will be using this component. This component is licensed for use only with such Citrix product(s) or service(s).", LicenseAgreementContentTitle: "CITRIX(R) LICENSE AGREEMENT", LoadingContent: "Loading Content...", LoggingOff: "Logging off Citrix Receiver...", LoginTimedOut: "Logon has timed out due to inactivity.", LogOff: "Log Off", LogoffError: "Logoff error", LogOffSessionsFailed: "If any apps are still running, please exit them manually.", LogOn: "Log On", LogonHasExpired: "Your logon has expired. Please log on again to continue.", LogonTextPassthrough: "To use the account you used to sign on to the computer, click Log On.", LogonTextSmartcard: "Insert your smart card into the reader and click Log On.", Menu: "Menu", More: "More", MultiApprovedApps: "Your request to add these apps is approved.", MultiDeniedApps: "Your request to add these apps is denied.", NoAppsFound: "No items match your search.", NoAvailableAuthMethods: "No logon methods are available on this platform.", NoUpdates: "No Updates Available", NoUpgradesAvailable: "No upgrades for Citrix Receiver are available.", NoWindowDownload: "If no window appears, proceed to download.", OK: "OK", OnceComplete: "After Citrix Receiver is installed, ", Open: "Open", Other: "Other", Overview: "Overview", PartialRefreshFailure: "Some servers failed to respond", PasswordExpiresTodayMessage: "Your password will expire today.", PasswordExpiresTomorrowMessage: "Your password will expire in 1 day.", PasswordExpiryChange: "Change Now", PasswordExpiryChangeLater: "Not Now", PasswordExpiryMessage: "Your password will expire in {0} days.", PasswordExpiryTitle: "Do you want to change your password?", Pending: "Pending", PendingApproval: "Pending Approval", PhoneOrTabletRequired: "Phone or tablet required", PhoneOrTabletRequiredMessage: "Please use an iPhone, iPad, or Android phone or tablet to access your apps and desktops.", PleaseLogOnToContinue: "Please log on to continue.", PopupBlockerDesktopAutoLaunch: "Citrix Receiver has connected your desktop. To see your desktop, allow pop-ups from this website in your browser.", PopupBlockerReconnectApps: "Citrix Receiver has reconnected your apps. To see your apps, allow pop-ups from this website in your browser.", Preferences: "Preferences", ProtocolHandlerUpgradeAvailable: "An upgrade for Citrix Receiver is available. Would you like to download and install it?", QuickAccess: "Favorites", ReceiverForMac: "Citrix Receiver for Mac", ReceiverForWindows: "Citrix Receiver for Windows", Refresh: "Refresh", RefreshInProgress: "Refreshing apps, please wait.", RememberLogonMethod: "Remember my logon method", Remove: "Remove", Request: "Request", Restart: "Restart", ResourceIsNotAvailable: "\"{0}\" is not available.", RetryDownload: "Retry download", SearchAppsPlaceholder: "Search All Apps", SearchDesktopsPlaceholder: "Search Desktops", SearchFavoritesPlaceholder: "Search Favorites", SearchPlaceholder: "Search", SearchResults: "Search Results ({0})", SecurityDetails: "Security details", SecurityInformationText: "Whenever you download a file over the Internet, there is always a risk that it will contain a security threat (a virus or a program that can damage your computer and the data stored on it). To check the file for security threats, click Install and then save the file to a suitable location on your computer. Scan the file with an up-to-date antivirus program and carry out any other checks required by your corporate security policy before running/installing the file. You may need to reconfigure the security settings on your computer to install or run the file.", SecurityInformationTitle: "SECURITY INFORMATION", SessionExpiresInMinutes: "Citrix Receiver will time out in {0} minutes and {1} seconds due to inactivity.", SessionExpiresInSeconds: "Citrix Receiver will time out in {0} seconds due to inactivity.", SessionsListFailure: "Cannot start your session. Wait a few minutes and try to log on again. If you still experience problems, contact your help desk.", SessionTimedOut: "Your session has timed out due to inactivity.", SingleApprovedApp: "Your request to add this app is approved.", SingleDeniedApp: "Your request to add this app is denied.", SkipToLogon: "Log on", SkipToLogonTip: "Click here to skip to log on", SoftwareNotDetected: "Software not detected", SoftwareNotDetectedDetails: "Citrix Receiver cannot be detected on your computer. If you know that Citrix Receiver is installed, you can click Continue to log on. If you need assistance, contact your help desk.", Start: "Start", StartApp: "Start App", StartAppMessage: "Please start this app from the Home screen of your phone or tablet.", Store: "Store", SwitchToExplicit: "Switch to user name and password", SwitchToSmartcard: "Switch to smart card", ThirdPartyNotices: "Third Party Notices", ThirdPartyNoticesWeb: "Citrix Receiver for Web", ThirdPartyNoticesHtml5: "Citrix Receiver for HTML5", TopRated: "Top Rated", TotalRefreshFailure: "Refresh Failed", TryAgain: "Try again", TryAnotherLogonOption: "Try another logon option", TrySearchingInApps: "Try searching in Apps.", UnblockCitrixPlugin: "Unblock the Citrix plug-in", UnsupportedDevice: "Unsupported device", UnsupportedDeviceMessage: "Please use a supported phone, tablet or desktop to access your apps and desktops.", Update: "Update", UpdatedCat: "Updates Available", Upgrade: "Update", UpgradeAvailable: "Update available", UpgradeCloseBrowser: "You may be asked to close your browser during the installation process.", UpgradeInProgress: "Upgrading Citrix Receiver software...", UpgradeLater: "Upgrade later", UpgradeLaterTip: "Click here to continue without upgrading Citrix Receiver", UseAnotherLogonOption: "Use another logon option", UseChromeApp: "Use the Citrix Receiver for Chrome App to access this site", UseFullVersion: "Use full version", UseLightVersion: "Use light version", UseReceiver: "Use Citrix Receiver to access your applications and desktops.", UsingFullVersion: "You are currently using the full version of Citrix Receiver. Would you like to change to the light version?", UsingLightVersion: "You are currently using the light version of Citrix Receiver. Would you like to change to the full version?", WaitAppInstallMessage: "Your app will be installed in a few minutes.", WaitWhileConfirmInstall: "Please wait while we confirm that Citrix Receiver was installed...", WebVersion: "Web version", WelcomeToReceiver: "Welcome to Citrix Receiver", WhenWindowAppearsLaunchApplication: "When a window appears, choose Launch Application.", YouCannotUseAppsOrDesktops: "There are no apps or desktops available to you at this time.", YouCannotUseDesktops: "There are no desktops available to you at this time.", YouCanUseLightVersion: "If you do not want to detect/install Citrix Receiver you can use the light version, with fewer features, in your browser.", YouHaveLoggedOff: "You have logged off successfully." |
Warning: Items are case sensitive!
You can set new value for the items by following the procedure below.
Code
- Javascript
Go to C:\inetpub\wwwroot\Citrix\<StoreName>Web\custom and open strings.en.js.
|
1 2 3 4 5 |
(function ($) { $.localization.customStringBundle("en", { itemName: "value", }); })(jQuery); |
Example:
I’d like to change the following items:

Code
- Javascript
Add the following code into strings.en.js:
|
1 2 3 4 5 6 7 8 |
(function ($) { $.localization.customStringBundle("en", { AllAppsForToolbar: "Apps", AllApps: "Applications", Categories: "Folders", SearchAppsPlaceholder: "Search CitrixGuru apps", }); })(jQuery); |
Result

Note: if you want to change the configuration for another language, you need to modify the proper javascript file (Ex: for French, you need to modify strings.fr.js in the custom folder).
Change storefront favicon
Code
- Javascript
Go to C:\inetpub\wwwroot\Citrix\<StoreName>Web\custom and open script.js.
|
1 |
$('link[rel="icon"]').attr('href','custom/favicon.png'); |
Before

After

Note: Make sure to copy your favicon file in the custom folder.
Before logon
Add disclaimer
Code
- Javascript
Go to C:\inetpub\wwwroot\Citrix\<StoreName>Web\custom and open script.js.
|
1 2 3 4 5 6 7 8 9 10 11 |
var doneClickThrough = false; CTXS.Extensions.beforeLogon = function (callback) { doneClickThrough = true; CTXS.ExtensionAPI.showMessage({ messageTitle: "Welcome to CitrixGuru Lab !", messageText: "Unauthorized access is strictly prohibited.", okButtonText: "Accept", okAction: callback }); }; |
Result

To display a long disclaimer, you may want to have scrollbar within your message. Here is how to do:
Code
- Javascript
Go to C:\inetpub\wwwroot\Citrix\<StoreName>Web\custom and open script.js.
|
1 2 3 4 5 6 7 8 9 10 11 |
var doneClickThrough = false; CTXS.Extensions.beforeLogon = function (callback) { doneClickThrough = true; CTXS.ExtensionAPI.showMessage({ messageTitle: "Welcome to CitrixGuru Lab !", messageText: "<div class='disclaimer'>citrixguru .... citrixguru</div>", okButtonText: "Accept", okAction: callback }); }; |
- CSS
Go to C:\inetpub\wwwroot\Citrix\<StoreName>Web\custom and open style.css.
|
1 2 3 4 |
.disclaimer { height: 200px; overflow-y: auto; } |
Result

Change logo during loading
Code
- CSS
Go to C:\inetpub\wwwroot\Citrix\<StoreName>Web\custom and open style.css.
|
1 2 3 4 5 6 |
.loading-logo { background-image: url(logo.png); width:170px; height:64px; } |
Before

After

Jump to the next item to change the background color during the loading.
Change background image during loading
Code
- CSS
Go to C:\inetpub\wwwroot\Citrix\<StoreName>Web\custom and open style.css.
|
1 2 3 |
.loading-screen { background-image: url(background.png); } |
Change background color during loading
Code
- CSS
Go to C:\inetpub\wwwroot\Citrix\<StoreName>Web\custom and open style.css.
|
1 2 3 |
.loading-screen { background-color: #FFFFFF; } |
Result

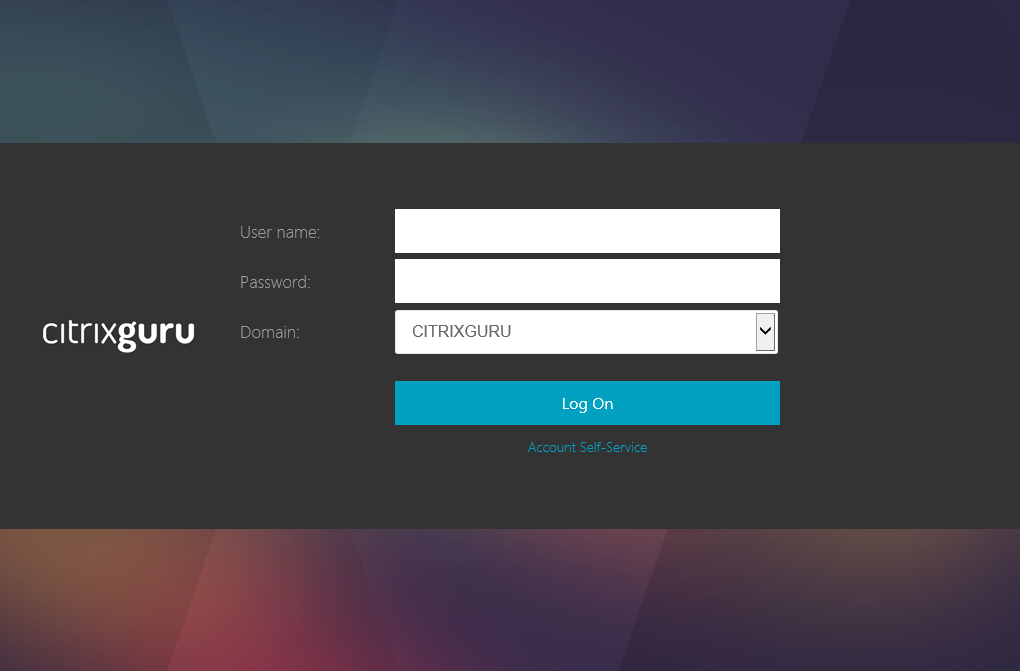
Logon page
Add header logo
Code
- Javascript
Go to C:\inetpub\wwwroot\Citrix\<StoreName>Web\custom and open script.js.
|
1 |
$('.customAuthHeader').html("<img src='custom/logoguru.png' alt='logo' />"); |
- CSS
Go to C:\inetpub\wwwroot\Citrix\<StoreName>Web\custom and open style.css.
|
1 2 3 4 5 |
.customAuthHeader { top:10px; margin-left:10px; text-align:left; } |
Add header
Code
- Javascript
Go to C:\inetpub\wwwroot\Citrix\<StoreName>Web\custom and open script.js.
|
1 |
$('.customAuthHeader').html("Text1<br /> Text2<br />"); |
- CSS
Go to C:\inetpub\wwwroot\Citrix\<StoreName>Web\custom and open style.css.
|
1 2 3 4 5 6 |
.customAuthHeader { font-size:12px; color:white; top:10px; text-align:center; } |
Result

Add text - middle Top
Code
- Javascript
Go to C:\inetpub\wwwroot\Citrix\<StoreName>Web\custom and open script.js.
|
1 |
$('.customAuthTop').html("Text1<br /> Text2<br /><br />"); |
- CSS
Go to C:\inetpub\wwwroot\Citrix\<StoreName>Web\custom and open style.css.
|
1 2 3 4 5 |
.customAuthTop { font-size:12px; color:white; text-align:center; } |
Result

Add text - middle Bottom
- Javascript
Go to C:\inetpub\wwwroot\Citrix\<StoreName>Web\custom and open script.js.
|
1 |
$('.customAuthBottom').html("<br />Text1<br />Text2"); |
- CSS
Go to C:\inetpub\wwwroot\Citrix\<StoreName>Web\custom and open style.css.
|
1 2 3 4 5 |
.customAuthBottom { font-size:12px; color:white; text-align:center; } |
Result

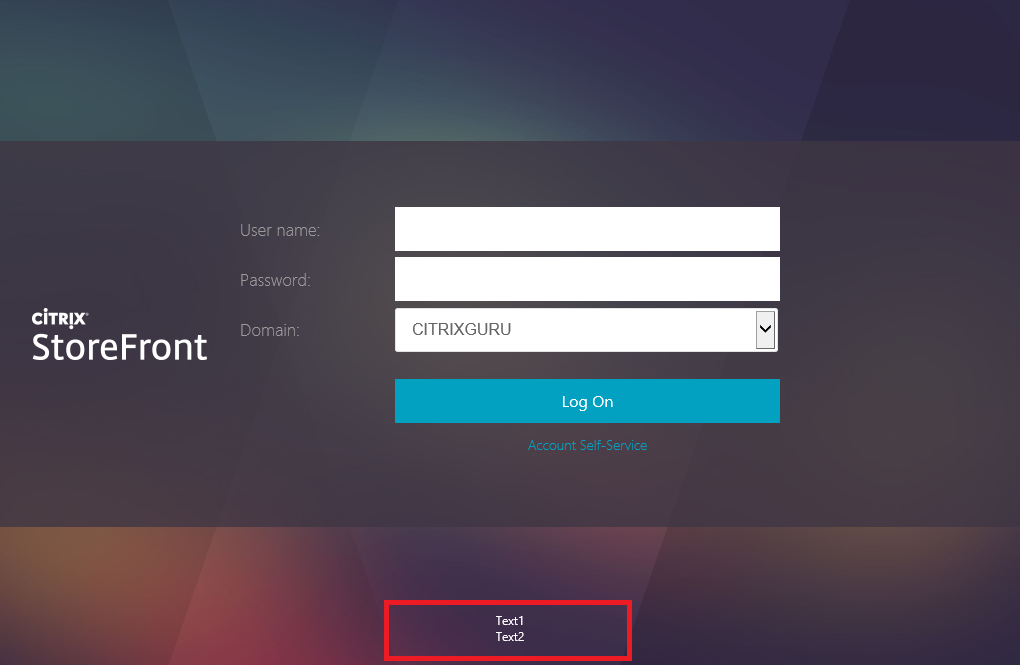
Add text - footer
Code
- Javascript
Go to C:\inetpub\wwwroot\Citrix\<StoreName>Web\custom and open script.js.
|
1 |
$('.customAuthFooter').html("Text1<br />Text2<br />"); |
- CSS
Go to C:\inetpub\wwwroot\Citrix\<StoreName>Web\custom and open style.css.
|
1 2 3 4 5 |
.customAuthFooter { font-size:12px; color:white; text-align:center; } |
Result
Change form text color
Code
- CSS
Go to C:\inetpub\wwwroot\Citrix\<StoreName>Web\custom and open style.css.
|
1 2 3 |
.credentialform .plain { color: red; } |
Result

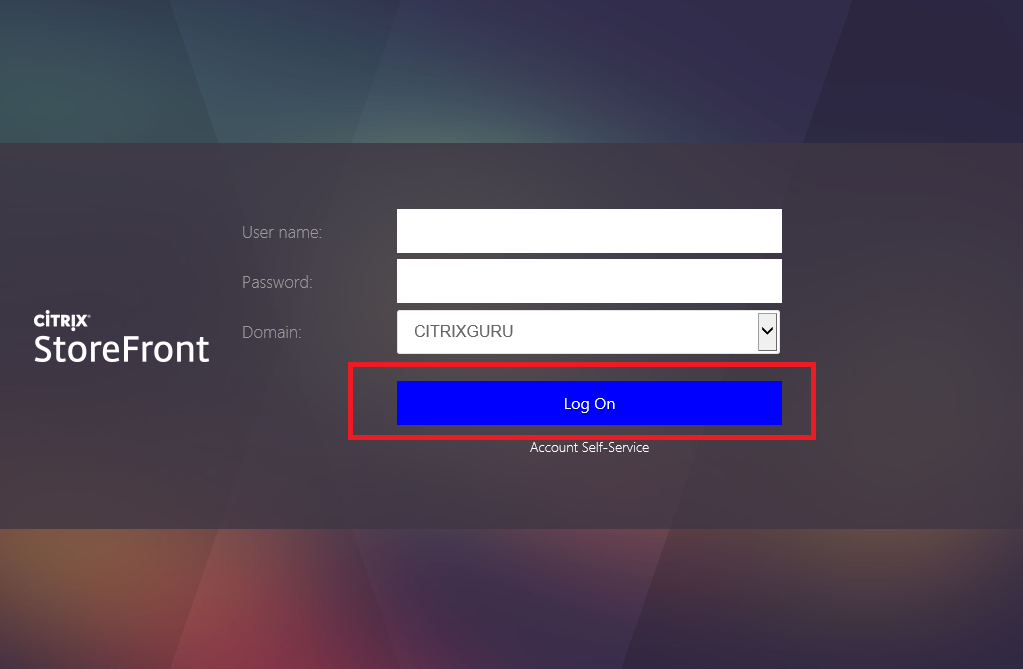
Change button color
Code
- CSS
Go to C:\inetpub\wwwroot\Citrix\<StoreName>Web\custom and open style.css.
|
1 2 3 4 |
.button.default { background-color: blue; color: #FFFFFF; } |
Result
Change message color
Code
- CSS
Go to C:\inetpub\wwwroot\Citrix\<StoreName>Web\custom and open style.css.
|
1 2 3 |
.web-screen .main-text { color: red; } |
Result

Change background image
Code
- CSS
Go to C:\inetpub\wwwroot\Citrix\<StoreName>Web\custom and open style.css.
|
1 2 3 4 |
.web-screen { background-image: url(background.png); } |
Image must be located in C:\inetpub\wwwroot\Citrix\<StoreName>Web\custom.
Result

Replace background image with a color
Code
- CSS
Go to C:\inetpub\wwwroot\Citrix\<StoreName>Web\custom and open style.css.
|
1 2 3 4 5 |
.web-screen { background-color: #CCCCCC; background-image:none; } |
Result

Change logo
Code
- CSS
Go to C:\inetpub\wwwroot\Citrix\<StoreName>Web\custom and open style.css.
|
1 2 3 4 5 6 7 8 |
.is-hdpi .logon-logo-container{ background-image: url('logo.png'); background-size: 170px 64px; } .logon-logo-container{ background-image: url('logo.png'); background-size: 170px 64px; } |
Image must be located in C:\inetpub\wwwroot\Citrix\<StoreName>Web\custom.
Result
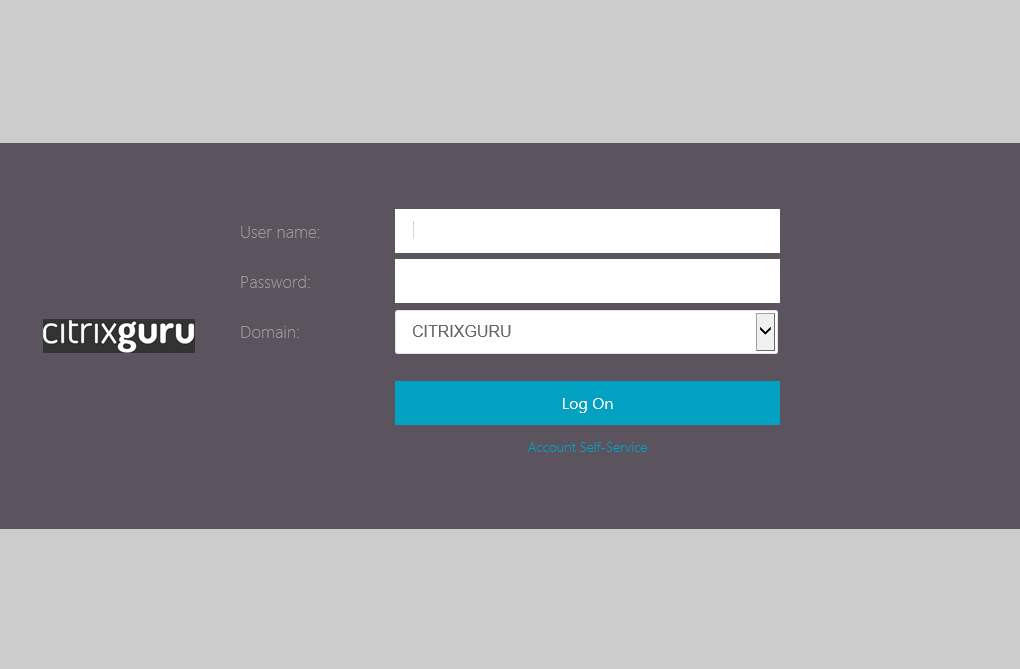
Jump to the next item to change the form background color.
Change form background color
Code
- CSS
Go to C:\inetpub\wwwroot\Citrix\<StoreName>Web\custom and open style.css.
|
1 2 3 |
.web-screen .content-area { background-color: #333333; } |
Result

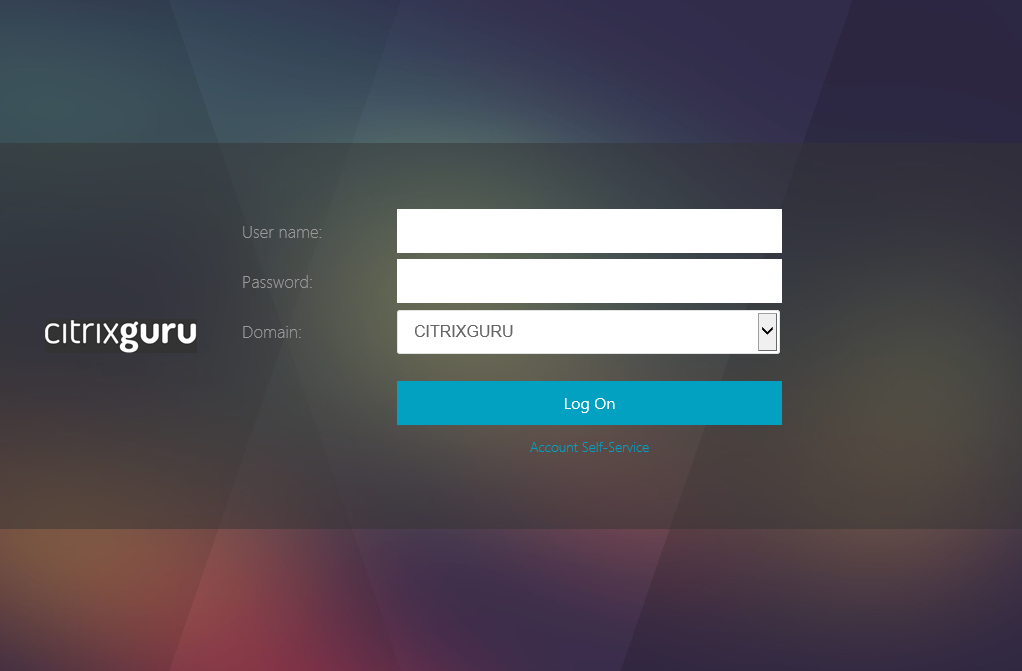
Form transparency
Code
- CSS
Go to C:\inetpub\wwwroot\Citrix\<StoreName>Web\custom and open style.css.
|
1 2 3 |
.web-screen .content-area { background-color: rgba(51,51,51,0.5); } |
Result

Form transparency with IE8
Code
- CSS
Go to C:\inetpub\wwwroot\Citrix\<StoreName>Web\custom and open style.css.
|
1 2 3 4 5 6 7 |
.web-screen .content-area { background-color: #333333; background: transparent; filter: progid:DXImageTransform.Microsoft.gradient(startColorStr=#7f333333,endColorStr=#7f333333); -ms-filter: "progid:DXImageTransform.Microsoft.gradient(startColorstr=#7f333333,endColorstr=#7f333333)"; background-color: rgba(51,51,51,0.5); } |
BEFORE IE8
AFTER IE8
Display server name in the footer
Originally posted here: Display server name with Citrix StoreFront 3.
IIS
Connect to your StoreFront server and open IIS console (inetmgr.exe). Select your StoreFront website (Default Web Site by default).

In the Features view, select HTTP response headers.

Select Add, and then type :
- Name: SF-ServerName
- Value: SF02

Select OK.

IIS is now configured.
Note: Make sure to repeat the operation on all your servers.
StoreFront configuration
- CSS
Go to C:\inetpub\wwwroot\Citrix\<StoreName>Web\Custom and open style.css.
Add the following code:
|
1 2 3 4 5 6 7 |
.customAuthFooter { font-size:12px; color:Black; bottom:10px; text-align: center; } |
- Javascript
Go to C:\inetpub\wwwroot\Citrix\<StoreName>Web\Custom and open script.js.
Add the following code:
|
1 2 3 4 5 6 7 |
var req = new XMLHttpRequest(); req.open('GET', document.location, false); req.send(null); var servername = req.getResponseHeader('SF-ServerName'); $('.customAuthFooter').html(servername); |
If needed, restart IIS with the following command:
|
1 |
iisreset /noforce |
Result
Connect to your StoreFront website, you should see the server name at the bottom of the page.

Before Applications/Desktops page
Add disclaimer
Code
- Javascript
Go to C:\inetpub\wwwroot\Citrix\<StoreName>Web\custom and open script.js.
|
1 2 3 4 5 6 7 8 9 10 11 12 13 |
var doneClickThrough = false; CTXS.Extensions.beforeDisplayHomeScreen = function (callback) { if (!doneClickThrough) { CTXS.ExtensionAPI.showMessage({ messageTitle: "Welcome Authenticated user!", messageText: "Click accept to show apps", okButtonText: "Accept", okAction: callback }); } else { callback(); } }; |
Result

To display a long disclaimer, you may want to have scrollbar within your message. Here is how to do:
Code
- Javascript
Go to C:\inetpub\wwwroot\Citrix\<StoreName>Web\custom and open script.js.
|
1 2 3 4 5 6 7 8 9 10 11 12 13 |
var doneClickThrough = false; CTXS.Extensions.beforeDisplayHomeScreen = function (callback) { if (!doneClickThrough) { CTXS.ExtensionAPI.showMessage({ messageTitle: "Welcome Authenticated user!", messageText: "<div class='disclaimer'>citrixguru .... citrixguru</div>", okButtonText: "Accept", okAction: callback }); } else { callback(); } }; |
- CSS
Go to C:\inetpub\wwwroot\Citrix\<StoreName>Web\custom and open style.css.
|
1 2 3 4 |
.disclaimer { height: 200px; overflow-y: auto; } |
Result

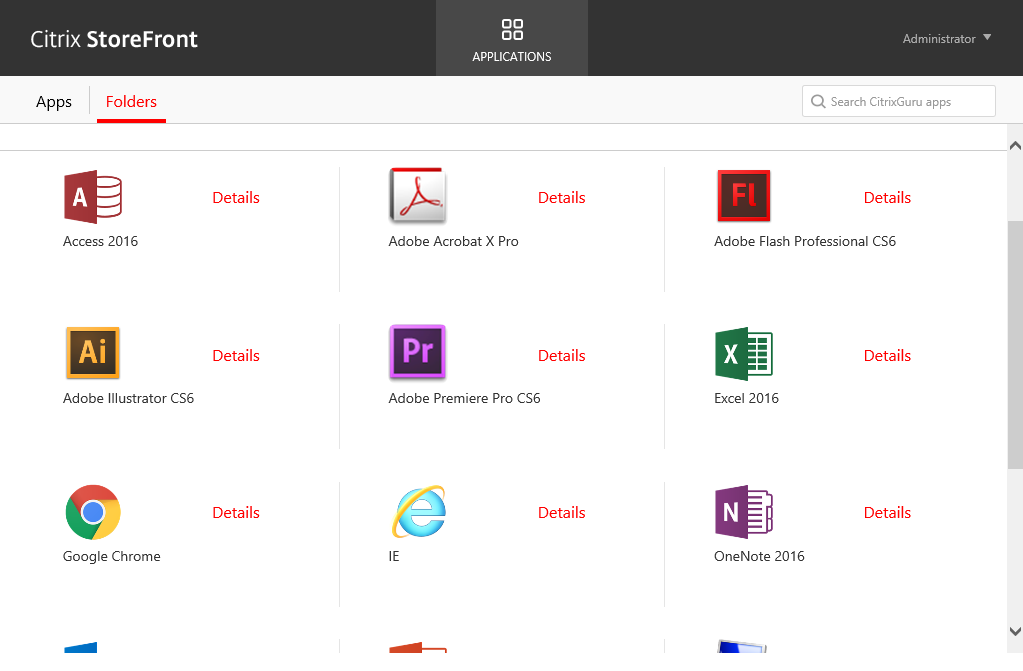
Applications/Desktops page
Navigate to a folder
Code
- Javascript
Go to C:\inetpub\wwwroot\Citrix\<StoreName>Web\Custom and open script.js.

Add the following lines:
|
1 2 3 |
CTXS.Extensions.afterDisplayHomeScreen = function (callback) { CTXS.ExtensionAPI.navigateToFolder('folder/path'); }; |
Replace folder/path by your folder name or the path of your folder.
To redirect to the root of the categories, add the following lines:
|
1 2 3 |
CTXS.Extensions.afterDisplayHomeScreen = function (callback) { CTXS.ExtensionAPI.navigateToFolder('/'); }; |
Result

Add Header bar
Code
- Javascript
Go to C:\inetpub\wwwroot\Citrix\<StoreName>Web\custom and open script.js.
|
1 |
$('#customTop').html("<a href='http://receiver.citrix.com/' target='_blank'><img src='media/rec-win-icon_1.png'> Download Citrix Receiver</a>"); |
- CSS
Go to C:\inetpub\wwwroot\Citrix\<StoreName>Web\custom and open style.css.
|
1 2 3 4 5 6 7 8 9 10 11 12 |
#customTop { text-align: center; background-color:#f9f9f9; color: #574f5b; font-size: 12px; padding-top:5px; margin-bottom:-20px; } #customTop a { color: #574f5b; } |
Result


Here is the receiver icon in case you want to use it.
![]()
Change header color
Code
- CSS
Go to C:\inetpub\wwwroot\Citrix\<StoreName>Web\custom and open style.css.
|
1 2 3 |
.theme-header-color { color:#FF0000; } |
BEFORE

AFTER

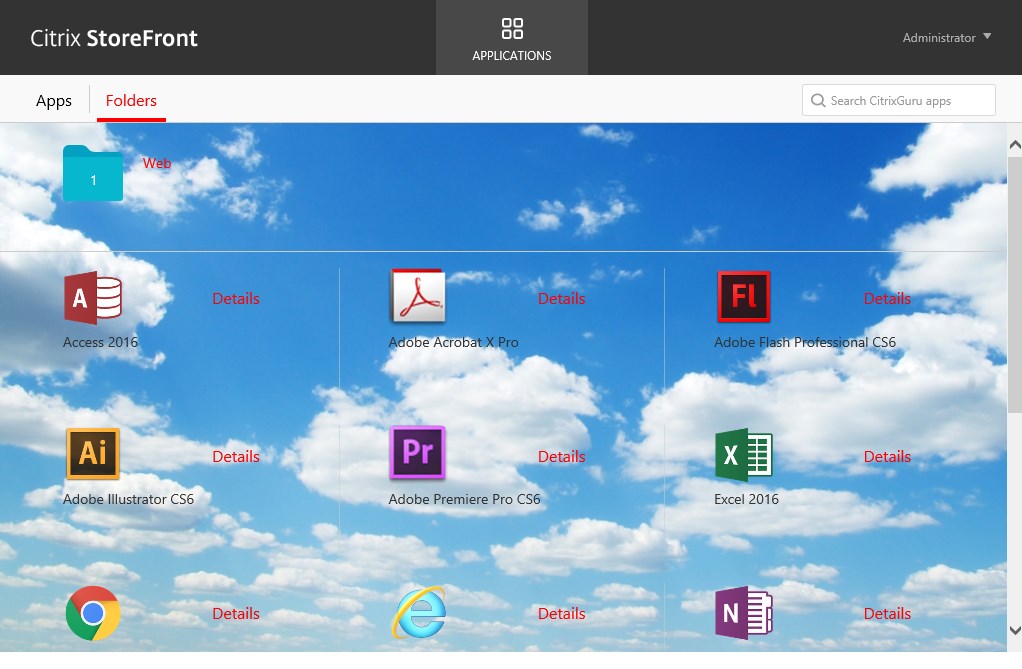
Add header background image
Code
- CSS
Go to C:\inetpub\wwwroot\Citrix\<StoreName>Web\custom and open style.css.
|
1 2 3 |
.theme-header-bgcolor{ background-image: url(cloud.jpg); } |
Before

After

Change header background color
Code
- CSS
Go to C:\inetpub\wwwroot\Citrix\<StoreName>Web\custom and open style.css.
|
1 2 3 4 |
.theme-header-bgcolor{ background-image: none; background-color:BLUE; } |
bEFORE

AFTER

Add gradient in the header
Code
- CSS
Go to C:\inetpub\wwwroot\Citrix\<StoreName>Web\custom and open style.css.
|
1 2 3 4 5 6 7 8 |
.theme-header-bgcolor { background-color:#00a498; background-image: -webkit-linear-gradient(left, #333333, #00a498); background-image: -moz-linear-gradient(left, #333333, #00a498); background-image: -ms-linear-gradient(left, #333333, #00a498); background-image: -o-linear-gradient(left, #333333, #00a498); background-image: linear-gradient(left, #333333, #00a498); } |
Result

Add gradient in the header with IE8 compatibility
Code
- CSS
Go to C:\inetpub\wwwroot\Citrix\<StoreName>Web\custom and open style.css.
|
1 2 3 4 5 6 7 8 9 |
.theme-header-bgcolor { filter: progid:DXImageTransform.Microsoft.gradient(GradientType=1, startColorStr='#333333', EndColorStr='#00a498'); background-color:#00a498; background-image: -webkit-linear-gradient(left, #333333, #00a498); background-image: -moz-linear-gradient(left, #333333, #00a498); background-image: -ms-linear-gradient(left, #333333, #00a498); background-image: -o-linear-gradient(left, #333333, #00a498); background-image: linear-gradient(left, #333333, #00a498); } |
Result on IE8
Change header height
Code
- CSS
Go to C:\inetpub\wwwroot\Citrix\<StoreName>Web\custom and open style.css.
|
1 2 3 4 |
.store-header { height: 100px; display: block; } |
Add header (scrolling with the apps)
Code
- CSS
Go to C:\inetpub\wwwroot\Citrix\<StoreName>Web\custom and open style.css.
|
1 2 3 4 |
#customScrollTop{ height:30px; background:blue; } |
Result

Change background
Code
- CSS
Go to C:\inetpub\wwwroot\Citrix\<StoreName>Web\custom and open style.css.
|
1 2 3 4 |
.storeViewSection { background: url('background.jpg') no-repeat center center fixed; background-size: cover; } |
Result
Change app titles color
Code
- CSS
Go to C:\inetpub\wwwroot\Citrix\<StoreName>Web\custom and open style.css.
|
1 2 3 4 5 |
.smallTiles .storeapp .storeapp-name, .largeTiles .storeapp .storeapp-name { color: red; font-weight:bold; } |
Result

Change categories, folders and details color
Code
- CSS
Go to C:\inetpub\wwwroot\Citrix\<StoreName>Web\custom and open style.css.
|
1 2 3 |
.theme-highlight-color { color:#FF0000; } |
BEFORE

AFTER

Note: This will also apply to Folders/Categories titles.
Change toolbar color
Code
- CSS
Go to C:\inetpub\wwwroot\Citrix\<StoreName>Web\custom and open style.css.
|
1 2 3 |
.toolbar{ background-color: #cccccc; } |
BEFORE

AFTER

Change top left logo
Code
- CSS
Go to C:\inetpub\wwwroot\Citrix\<StoreName>Web\custom and open style.css.
|
1 2 3 4 5 6 7 8 |
.is-hdpi .logo-container{ background-image: url('logo.png'); background-size: 152px 34px; } .logo-container{ background-image: url('logo.png'); background-size: 152px 34px; } |
Result

Display server name in the footer
Originally posted here: Display server name with Citrix StoreFront 3.
IIS
Connect to your StoreFront server and open IIS console (inetmgr.exe). Select your StoreFront website (Default Web Site by default).
In the Features view, select HTTP response headers.
Select Add, and then type :
- Name: SF-ServerName
- Value: SF02
Select OK.
IIS is now configured.
Note: Make sure to repeat the operation on all your servers.
StoreFront configuration
- CSS
Go to C:\inetpub\wwwroot\Citrix\<StoreName>Web\Custom and open style.css.
Add the following code:
|
1 2 3 4 5 6 7 8 |
#customBottom { text-align:center; font-size:12px; color:Black; padding:10px; position:static; } |
- Javascript
Go to C:\inetpub\wwwroot\Citrix\<StoreName>Web\Custom and open script.js.
Add the following code:
|
1 2 3 4 5 6 7 |
var req = new XMLHttpRequest(); req.open('GET', document.location, false); req.send(null); var servername = req.getResponseHeader('SF-ServerName'); $('#customBottom').html(servername); |
If needed, restart IIS with the following command:
|
1 |
iisreset /noforce |
Result
Logon to the webpage, you should also see the server name at the bottom of the applications page.

You can play with the CSS to display the server name wherever you want.
Add a random text in the footer
Code
- Javascript
Go to C:\inetpub\wwwroot\Citrix\MainStoreWeb\custom and open script.js.
|
1 2 3 4 5 6 7 8 9 10 11 12 13 14 15 16 17 18 19 20 21 22 23 24 25 26 27 28 29 30 31 32 33 34 35 36 37 38 39 40 41 42 43 44 45 46 47 |
var lines; var randomNumber; var lastRandomNumber; $( document ).ready(function() { // load the trivia from the server $.ajax({ url: 'trivia.txt' }).done(function(content) { // normalize the line breaks, then split into lines lines = content.replace(/\r\n| \r/g, '\n').trim().split('\n'); // only set up the click handler if there were lines found if (lines && lines.length) { // loop to prevent repeating the last random number while (randomNumber === lastRandomNumber) { randomNumber = parseInt(Math.random() * lines.length); // check to prevent infinite loop if (lines.length === 1) { break; } } // keep track of the last random number lastRandomNumber = randomNumber; // show the corresponding line $('#trivia').text(lines [randomNumber]); } }); }); |
By default, the script will try to find trivia.txt located in C:\inetpub\wwwroot\Citrix\<StoreName>Web.
You also need to add the following to display the footer and the random message (please review the “Add a footer” section in this post) :
|
1 |
$('#customBottom').html("<p id='trivia'></p>"); |
- CSS
Then, open style.css (in the same directory) and add the following:
|
1 2 3 |
#trivia { font: italic 14pt Arial; } |
You can modify the CSS to fit your needs.
The last step is to create trivia.txt in C:\inetpub\wwwroot\Citrix\MainStoreWeb.
|
1 2 3 4 5 6 |
Message 1 Message 2 Message 3 Message 4 Message 5 Message 6 |
StoreFront will display a different message every time you refresh the page.
Note: I’ve adapted the script from this website.
Featured App Groups
Change bar image
Code
- CSS
Go to C:\inetpub\wwwroot\Citrix\<StoreName>Web\custom and open style.css.
|
1 2 3 4 5 6 7 8 |
.appBundle1 { background-image: url('Bundlebackground.png'); } .bundleDetail.appBundle1 { background-image: url('Bundlebackground.png'); background-size: 100% 200%; } |
Note: appBundle1 is the 1st picture, appBundle2 is the 2nd, etc.
Before

After

Change Featured app groups background color
Code
- CSS
Go to C:\inetpub\wwwroot\Citrix\<StoreName>Web\custom and open style.css.
|
1 2 3 4 5 6 7 8 9 10 11 |
.largeTiles .applicationBundleContainer { background-color: rgba(51, 51, 51, 0.5); margin-top: 0; padding-top: 25px; } .smallTiles .applicationBundleContainer { background-color: rgba(51, 51, 51, 0.5); margin-top: 0; padding-top: 14px; } |
Result

Change Featured app groups title and text
Code
- CSS
Go to C:\inetpub\wwwroot\Citrix\<StoreName>Web\custom and open style.css.
|
1 2 3 4 5 6 7 8 9 10 11 12 |
.largeTiles .applicationBundleTitle { color:black; } .smallTiles .applicationBundleTitle { color:black; } .largeTiles .applicationBundleText { color:red; } .smallTiles .applicationBundleText { color:red; } |
Before

After
Change featured app groups background image
Code
- CSS
Go to C:\inetpub\wwwroot\Citrix\<StoreName>Web\custom and open style.css.
|
1 2 3 4 5 6 7 |
.largeTiles .applicationBundleContainer { background-image: url('cloud.png'); } .smallTiles .applicationBundleContainer { background-image: url('cloud.png'); } |
Result

About
Change logo
Code
- CSS
Go to C:\inetpub\wwwroot\Citrix\<StoreName>Web\custom and open style.css.
|
1 2 3 4 5 |
.citrixReceiverLogoAboutBox { background-image: url('logoguru.png'); height:64px; width:170px: } |
Result

Change content
Code
- Javascript
Go to C:\inetpub\wwwroot\Citrix\<StoreName>Web\custom and open script.js.
|
1 2 3 4 5 6 7 8 |
(function ($) { $.localization.customStringBundle("en", { ThirdPartyNotices: "CitrixGuru", ThirdPartyNoticesWeb: "Notices", CitrixCopyright: "\u00a9 2016 citrixguru.com.", AllRightsReserved: "Go to visit citrix.com", }); })(jQuery); |
Result

Change background color
Code
- Javascript
Go to C:\inetpub\wwwroot\Citrix\<StoreName>Web\custom and open style.css.
|
1 2 3 |
.aboutBox, .about-view { background-color: red; } |
Result

Change background image
Code
- Javascript
Go to C:\inetpub\wwwroot\Citrix\<StoreName>Web\custom and open style.css.
|
1 2 3 |
.aboutBox, .about-view { background-image: url('cloud.png'); } |
Result

Sources:
Welcome to Receiver X1
Citrix customization cookbook
X1 Customization: Going deeper with CSS
More from the Lab!
- Building a Dual-Xeon Citrix Lab: Part 1 – Considerations
- Building a Dual-Xeon Citrix Lab: Part 2 – Hardware
- Building a Dual-Xeon Citrix Lab: Part 3 – Windows and Hyper-V installation
- Lab: Part 4 – Hyper-V Networking
- Lab: Part 5 – NetScaler 11 Architecture and Installation
- Lab: Part 6 – Configure NetScaler 11 High Availability (HA Pair)
- Lab: Part 7 – Upgrade NetScalers in HA
- Lab: Part 8 – Save, Backup and Restore NetScaler 11 configuration
- Lab: Part 9 – Install Microsoft SQL Server 2014 (Dedicated)
- Lab: Part 10 – Citrix Licensing demystified
- Lab: Part 11 – Install XenDesktop 7.6
- Lab: Part 12 – Setup NetScaler 11 Clustering (TriScale)
- Lab: Part 13 – Configure Published Applications with XenDesktop 7.6
- Lab: Part 14 – Citrix StoreFront 3.x
- Lab: Part 15 – Configure SSL in StoreFront
- Lab: Part 16 – StoreFront load balancing with NetScaler (Internal)
- Lab: Part 17 – Optimize and secure StoreFront load balancing with NetScaler (Internal)
- Lab: Part 18 – Secure LDAP (LDAPS) load balancing with Citrix NetScaler 11
- Lab: Part 19 – Configure Active Directory authentication(LDAP) with Citrix NetScaler 11
- Lab: Part 20 – RDP Proxy with NetScaler Unified Gateway 11
- Lab: Part 21 – Secure SSH Authentication with NetScaler (public-private key pair)
- Lab: Part 22 – Ultimate StoreFront 3 customization guide
- Lab: Part 23 – Securing Citrix StoreFront DMZ deployment
- Lab: Part 25 – Upgrade to Citrix StoreFront 3.7
- Lab: Part 26 – Install/Upgrade Citrix XenDesktop 7.11
- Lab: Part 27 – Getting started with Microsoft Azure
- Lab: Part 28 – Getting started with Citrix Cloud
- Lab: Part 29 – Configure XenDesktop And XenApp Service with Microsoft Azure and Citrix Cloud
- Lab: Part 30 – Configure Identity and Access Management in Citrix Cloud with Microsoft Azure AD
- Lab: Part 31 – Configure NetScaler Gateway Service for XenApp and XenDesktop Service in Citrix Cloud
- Lab: Part 32 – Configure MCS with XenDesktop and XenApp Service in Citrix Cloud
- Lab: Part 33 – Configure Azure Quick Deploy with XenDesktop and XenApp Service in Citrix Cloud
- Lab: Part 34 – Configure Site Aggregation for Citrix Workspace in Citrix Cloud with XenDesktop 7.x located on-premises
- Lab: Part 35 – Configure a Hybrid NetScaler MA Service environment in Citrix Cloud
- Lab: Part 36 – Configure ShareFile in Citrix Cloud with StorageZones on-premises
- Lab: Part 37 – Upgrade NetScaler HA pair with NetScaler MA Service in Citrix Cloud
- Lab: Part 38 – How to Configure Full VPN Setup with Citrix NetScaler in CLI
- Lab: Part 39 – Configure Multi-Factor Authentication with Azure MFA Service and Citrix Workspace
- Lab: Part 40 – Getting Started with Citrix App Layering
- Lab: Part 41 – Configure Citrix App Layering
- Lab: Part 42 – OS Layer with Citrix App Layering
- Lab: Part 43 – Platform Layer with Citrix App Layering
- Lab: Part 44 – Application Layers with Citrix App Layering
- Lab: Part 45 – Layered Image Deployment with Citrix App Layering
- Lab: Part 46 – Elastic deployment with Citrix App Layering
- Lab: Part 47 – User Layers with Citrix App Layering
- Lab: Part 48 – Windows 10 and PVS with Citrix App Layering


Hi Nicolas,
Thanks for the great article , is there anyway to change the published app’s icon size ?
Thanks for a great site!
“Change background during loading”
It says:
.loading-screen {
background-image: #FFFFFF;
}
But the correct line is “color” instead of “image”, that’s how I got it to work.
Thanks Fredrik, I’ve corrected the article.
What class can I use to modify the height of the existing gray header bar on the Applications/Desktops page?
By the way, thank you for posting this article. It has been a great resource.
I’ve added the code in the article.
.store-header {
height: 100px;
display: block;
}
Awesome article. How can I add a header logo to the logon page?
Hello, I’ve added the “Add header logo” section. Please take a look.
Any Idea how to add a functional hyperlink when adding text to the logon page?
Something like that?
Go to C:\inetpub\wwwroot\Citrix\<StoreName>Web\custom and open script.js.
$('.customAuthTop').html("Text1<br /> <a href="https://www.citrixguru.com” rel="nofollow">citrixguru</a><br /><br />");
CSS
Go to C:\inetpub\wwwroot\Citrix\<StoreName>Web\custom and open style.css.
.customAuthTop {
font-size:12px;
color:white;
text-align:center;
}
Hi Nicolas,
i have attempted this but it has not worked…im using Storefront 3.8
i wanted to but them on the footer so my code is below
FROM CSS
#customBottom
{
text-align:center;
font-size:30px;
position:static;
}
.customAuthFooter
{
font-size:30px;
color:yellow;
text-align: center;
}
$(‘#customBottom’).html(“Text1 citrixguru“);
$(‘.customAuthFooter’).html(“Text1 citrixguru“);
Sorry, seem to not paste over correctly
from script.js
$(‘#customBottom’).html(“Text1 citrixguru“);
$(‘.customAuthFooter’).html(“Text1 citrixguru“);
Nice.. thanks – very useful.
Have a question – I want to add an additional URLs like to applications – eg a link to documentation or where the user can find support for that app. I tried to embed html in the ‘description’ but it doesn’t get decoded properly. Anyone have any ideas? Thought to add some custom .js but I can’t find enough example to get me going.
Awesome article. How can I change the client name?
Previously in WI5.4, I’ve modified SessionUtils.java file located in C:\inetpub\wwwroot\Citrix\XenApp\app_code\PagesJava\com\citrix\wi\pageutils.
deviceInfo.setClientName(“EXT_” + clientName);
It was working fine … but I’ve migrated to SF3.5 … couldn’t find how to do it ?
Thanks for helping 🙂
Stephane
This was awesome , I have one burning issue my company allows users to download AV from the Web Interface how can I provide the function in Storefront without screwing it up…
Please can you advise how to change the background colour of the logon boxes. Thanks Jamie.
I believe it’s: .credentialform input[type=text], .credentialform input[type=password, .credentialform .pseudo-input {
background-color: #ffffff;
I searched for the same because I wanted to use a White Background. Correct is:
.credentialform input[type=”text”], .credentialform input[type=”password”], .credentialform .pseudo-input {
background-color: #CCCCCC;
}
Hi Nicolas,
Any idea how can i change the color for textboxes from logon page?…username…password …domain.
i ask this because was needed to change the background color to white and now the textboxes can not be seen.
Thank you!
Hi Nicolas,
great article. I have two questions:
1. Is it possible to change the url in the about box? now it is http://www.citrix.com and i like to use a page of our company
2. Is it possible te add a footer to the desktop/applications page only?
Hi Erwin, not sure if you already found it but for your first question, you need to change it to the receiver.html file located in C:\inetpub\wwwroot\Citrix\yourstoreWeb
You would also need to do a iisreset for changes to be applied.
Can we change Account Self Service to say “Forgot Your Password?”
Great Article.
Does anybody know how to change link color underneath Logon Button (“Account self service”)?
Thanks,
Timo
Found it, Anybody who is interested in. You can change the color in Style.css located in C:\inetpub\wwwroot\Citrix\StoreWeb\custom. Below you will a short example.
.web-screen .detail-text{
color:#ffffff;
font-size:20px;
font-weight:300
}
This didn’t work for me. The text under Log On is “Switch to user name and password” and it’s still a light blue but it’s hard to read with the company image in the background. Anybody else know how to change this text color?
Found it. Add to style.css:
.authentication-link {
color:#FFFFFF
}
I have pass-through and username/password enabled. When users log off they have a checkbox option to “Remember my logon method.” By default this option is selected. Does anyone know how to deselect this option as default?
Another question: some of my longer application names are being cut off. Is there a way to force the entire application name to appear?
Thanks for an awesome site. You have put all the needed customizations in just one page with collapsible/expandable boxes which adds in further delight in accessibility. I have just upgraded my StoreFront from 3.0 to 3.5 with most of these customizations.
Thankyou for such a valuable information. Keep up the good work..!!!
Glad you like it ! thanks for reading my blog.
Thank you so much for your message 🙂
Great article.
Does anyone know how to change to background colour in the logoff page (the page wich appaers after logoff)
I believe you need to change the background on the logon and it applies at logoff too.
Hi All, I am using SF v3.7, is it possible to put a logoff icon that is always visible rather than needing to click on the username drop down? or, make ‘logoff’ the default rather than the username?
Simply Awesome. One of the valuable information given in a single page. It’s Greatest one which i have found in a site. You are really Champ Nicolas. Keep up Good Show looking forward for the same..
HELP! First off, a great site – excellent. I’m going round and round in circles. All I want is a text hyperlink on the logon page. Like a message of the day but with a hyperlink firing off to another website. I have tried several methods, each aren’t working. This one seems to be the closest, but not working for me. $(‘#customAuthBottom’).html(“Visit W3Schools “); This shows nothing. I get text without the hyperlink using $(‘.customAuthBottom’).html(“Click Here”); But I just want a working hyperlink – please… (SF 3.7).
Update: it’s showing as I want it on the time-out logged off screen, so it’s hiding somewhere…to be continued.
Figured it out: Amended script.js, adding the code:
$(‘.customAuthBottom’).html(“                      Click here to reset or unlock your account password. “);
Plenty of space padding to line it up how I wanted, I’m not the best HTML coder!
Great Article!!
Great post!
Any idea of how to not have the login form aligned to the center? I would like to move it a bit to the left.
Hi!
Great Article!
Do you know how to change the thirdPartyNoticeLink – not the name, but the destination?
Thanks!
The custom receiver icon image in the header bar does not flow through into native receiver.
Just seeing x in Native Receiver 4.5 and 4.6
Does anyone know of a way to display the receiver client version along with the SF server name in the footer? I have the SF server name displayed without issue, but adding the Receiver client version is a bit more difficult. Thanks!
I’m running Storefron v3.8. and XenApp 7.12. I tried using the code to change the About content. I placed the code into the script.js and noting happened. The code to change the logo that is added to the style.css worked fine. Not sure why the js for modifying the About content is not executing. Still shows the default text.
same here . I am running Storefront 3.9. Nothing above worked
Hi.
Is there any way to keep the default tab as favorites on user log in .
what i am looking for is when the user log in to storefront the default page will be favorties.
is their any possibility?
Are you able to make these customizations while running the Classic theme on StoreFront? Or do you have to have the new UI enabled?
Hi,
thanks for the great stuff. I just have a question reqarding the displaying of Servername. As of I propagate changes from one StoreFront Server to another, my ResponseHeader(‘SF-ServerName’); gets overwritten from Server XYZ 02 to Server XYZ 01. I would propose to write the ServerName into a textfile, which will be placed somewhere else. Any idea how to deal with it?
Is it possible to have the Favorites options in the native Receiver, but not in Receiver for Web?
Thank you very much, really helpful site 🙂
I have a question. As of I set up a customized loading logo, I see the new logo only at desktop sites. On my mobile phone I still see Citrix Receiver logo multiple times. It looks really strange.
How to remove the “About” from the content? I tried to remove it from .js file but not working.
@ yawhing, to delete the ‘About’ button, amend the script.js file and add:
(function ($) {
$.localization.customStringBundle(“en”, {
About: “”,
});
})(jQuery);
There’s a whole list of variables (strings) you can change, the format for example:
(function ($) {
$.localization.customStringBundle(“en”, {
AppStore: “Citrix Appstore”,
About: “”,
});
})(jQuery);
I found the strings in the ctx.strings_1C19D57C5BC66253.js file in receiver\js\localization\en
Worked for me after hours of searching!
Hi
I need add/change password complexity requirements message in StoreFront page. Currently when the user doesn’t meet the requirements it displays the default message :
Your new password must meet password policy requirements. Check the minimum password length, password complexity and password history requirements.
where do I make this change?
Many thanks
Any updates for Storefront 3.9? Trying to add a couple URL’s to the storefront login page. Code in replies does not work.
We access our XenDesktops via Linux Thin clients that boot to Firefox hardcoded to the StoreWeb page. We would like to redirect the “time out” page back to the logon page. We have accomplished it with the “logoff” page by editing the strings.en.js file. Can it be done?
Awesome Guide.
I would liketo add another icon to the right of “Apps” called “Help”. This would just be a html page with a reference guide and possibley a form fo a user to fill in to report an issue.
How would I go about doing that? I tried using something that was posted on Carl’s site (http://www.carlstalhood.com/storefront-3-5-tweaks/#special) which used CTXS.ExtensionAPI.addHelpButton but that didn’t seem to work with SF 3.11
Thank you in advance
Magnus
Hi,
I’ve used your code to “change top left logo”. It works on the MyStoreweb site, but not when using receiver to connect to MyStore? The Citrix logo has disappeared, but has not been replaced with the new one.
Sonia.
Ignore my earlier comment. Typical after fiddling about for ages and then saying it’s not working – it does!
haha 🙂
Hi there,
Firstly, fantastic article. 🙂 Was just going through the section where you detail changing the loading screen logo, loading screen background image, and colour.
The background image works, the background colour works, but not the loading logo. I’m running SF3.11. Do you know if “change logo during loading” on 3.11 supported or is something else wrong? I’ve cut and pasted straight from the example above.
Thanks in advance,
Pete
Try using .large .loading-logo {
background-image: url(yourlogo.jpg);
background-size: 403px 185px;
}
.loading-logo {
background-image: url(yourlogo.jpg);
width:403px;
height:185px;
}
First off, Awesome site! Thank you for helping the community! I have a question, I am looking for a way to change the text color and logo when I am redirected to the Install Citrix Receiver page. I am not seeing in this post an option to modify that. I was able to modify the log off page but cannot find out how to change the Detect Receiver landing page text and add a logo instead of it displaying Citrix Receiver. Help much appreciated!
Fantastic article..! I used a lot from here. Thanks for it Nicholas. I could get everything working apart from just one thing. The Logo doesn’t follow on the Logoff screen. For the login screen, it appears fine and I have used .customAuthHeader in .CSS for logo with an entry in script.js file as below:
$(‘.customAuthHeader’).html(“”);
Please help. Thanks a ton once again.
Hello Nicholas
Thanks for the great article. I used a lot of settings from here and all of them worked like a treat. The only thing I have issues with is the logo on the Login screen doesn’t follow on the Logoff screen.
I have used background colour setting .CSS and logo top right for Login screen along with the entry in .js file as follows:
$(‘.customAuthHeader’).html(“”);
Please help
Hello Nicholas,
how can i change the color from the “username and password” link on the logon screen?
Hi Nicholas
I am trying to add a post logon message and I cant get it to work. I edit the custom.script.js custom.style and custom.wrstring files where i made the changes. I was wondering if you can post some suggestion. I am using StoreFront 3.9
Hello,
thanks to your article, I’ve added a custom header to the Apps page (no download link, just a hint for our users). Unfortunatley, this new Element seems to cover the back Button that you see when clikcing an app’s Detail Link. You need it to return to the normal App List. It is still there and clickable, but not visible. Any Idea?
Code:
#customTop {
text-align: center;
background-color:#f9f9f9;
color: #574f5b;
font-size: 12px;
padding-top:5px;
margin-bottom:-20px;
}
Hello again. Forget it. Today It’s gone. Maybe some sort of IE cache issue.
Hi Nicolas, awesome article!
One query. I have a customer who wants a dark background with white text on the apps and desktops screen. This is easily achievable using the post you have put together above. However, the one annoying thing is that they also use Featured App Groups, and changing the text color to white also changes the arrows on the buttons at each end of the Featured App Groups to white. Which means the Featured App Groups look stupid, because now they are all-white circles with no arrow to be seen 🙁
Don’t suppose you’d have any idea how to change this? I can see the element appears to be inheriting the colour that I’ve overridden in the custom CSS file from .theme-highlight-color. Ideally, I’d like to change the text to white but leave the arrows on the Featured App Groups as a darker colour, or even the default.
Thanks in advance!
JR
Regarding my question above:-
not to worry 🙂
I got around this by simply editing each individual element in style.css to make it white
.smallTiles .storeapp .storeapp-name,
.largeTiles .storeapp .storeapp-name {
color: white;
font-weight:normal;
}
.no-results-message, .no-fav-results-message {
color:#FFFFFF;
}
.smallTiles .storeapp-category,
.largeTiles .storeapp-category {
color:#FFFFFF;
}
.smallTiles .storeapp-action-link, .taskapp-action-link,
.largeTiles .storeapp-action-link, .taskapp-action-link {
color:#FFFFFF;
}
.smallTiles .store-view .store-apps-title,
.largeTiles .store-view .store-apps-title {
color:#FFFFFF;
}
.large .store-view .toolbar-button {
color:#FFFFFF;
}
.large .store-view .toolbar-button.selected {
color:#FFFFFF;
}
For the record, never would have been able to do this without your article anyways 🙂
When your loading-logo isn’t working Then it probably has to do with this part:
.large .detection-right-links, .large .loading-logo
It injects before the loading-logo part.
Place this part in your custom/style.css
.large .detection-right-links, .large .loading-logo {
background-image: url(Logo.png);
}
And your loading-logo customisation will work again.