


This is the fifth in a series of posts about my new dual-Xeon Citrix lab project. In this post, we will review Netscaler 11 architecture and install two NetScaler virtual appliances(VPX).
More from the Lab!
- Building a Dual-Xeon Citrix Lab: Part 1 – Considerations
- Building a Dual-Xeon Citrix Lab: Part 2 – Hardware
- Building a Dual-Xeon Citrix Lab: Part 3 – Windows and Hyper-V installation
- Lab: Part 4 – Hyper-V Networking
- Lab: Part 5 – NetScaler 11 Architecture and Installation
- Lab: Part 6 – Configure NetScaler 11 High Availability (HA Pair)
- Lab: Part 7 – Upgrade NetScalers in HA
- Lab: Part 8 – Save, Backup and Restore NetScaler 11 configuration
- Lab: Part 9 – Install Microsoft SQL Server 2014 (Dedicated)
- Lab: Part 10 – Citrix Licensing demystified
- Lab: Part 11 – Install XenDesktop 7.6
- Lab: Part 12 – Setup NetScaler 11 Clustering (TriScale)
- Lab: Part 13 – Configure Published Applications with XenDesktop 7.6
- Lab: Part 14 – Citrix StoreFront 3.x
- Lab: Part 15 – Configure SSL in StoreFront
- Lab: Part 16 – StoreFront load balancing with NetScaler (Internal)
- Lab: Part 17 – Optimize and secure StoreFront load balancing with NetScaler (Internal)
- Lab: Part 18 – Secure LDAP (LDAPS) load balancing with Citrix NetScaler 11
- Lab: Part 19 – Configure Active Directory authentication(LDAP) with Citrix NetScaler 11
- Lab: Part 20 – RDP Proxy with NetScaler Unified Gateway 11
- Lab: Part 21 – Secure SSH Authentication with NetScaler (public-private key pair)
- Lab: Part 22 – Ultimate StoreFront 3 customization guide
- Lab: Part 23 – Securing Citrix StoreFront DMZ deployment
- Lab: Part 25 – Upgrade to Citrix StoreFront 3.7
- Lab: Part 26 – Install/Upgrade Citrix XenDesktop 7.11
- Lab: Part 27 – Getting started with Microsoft Azure
- Lab: Part 28 – Getting started with Citrix Cloud
- Lab: Part 29 – Configure XenDesktop And XenApp Service with Microsoft Azure and Citrix Cloud
- Lab: Part 30 – Configure Identity and Access Management in Citrix Cloud with Microsoft Azure AD
- Lab: Part 31 – Configure NetScaler Gateway Service for XenApp and XenDesktop Service in Citrix Cloud
- Lab: Part 32 – Configure MCS with XenDesktop and XenApp Service in Citrix Cloud
- Lab: Part 33 – Configure Azure Quick Deploy with XenDesktop and XenApp Service in Citrix Cloud
- Lab: Part 34 – Configure Site Aggregation for Citrix Workspace in Citrix Cloud with XenDesktop 7.x located on-premises
- Lab: Part 35 – Configure a Hybrid NetScaler MA Service environment in Citrix Cloud
- Lab: Part 36 – Configure ShareFile in Citrix Cloud with StorageZones on-premises
- Lab: Part 37 – Upgrade NetScaler HA pair with NetScaler MA Service in Citrix Cloud
- Lab: Part 38 – How to Configure Full VPN Setup with Citrix NetScaler in CLI
- Lab: Part 39 – Configure Multi-Factor Authentication with Azure MFA Service and Citrix Workspace
- Lab: Part 40 – Getting Started with Citrix App Layering
- Lab: Part 41 – Configure Citrix App Layering
- Lab: Part 42 – OS Layer with Citrix App Layering
- Lab: Part 43 – Platform Layer with Citrix App Layering
- Lab: Part 44 – Application Layers with Citrix App Layering
- Lab: Part 45 – Layered Image Deployment with Citrix App Layering
- Lab: Part 46 – Elastic deployment with Citrix App Layering
- Lab: Part 47 – User Layers with Citrix App Layering
- Lab: Part 48 – Windows 10 and PVS with Citrix App Layering
Introduction
What is Citrix NetScaler?

NetScaler is an application delivery controller (ADC) working between Level4 and Level7 (OSI model), performing traffic analysis to optimize, secure and intelligently distribute it.
Features
There are plenty of features associated with Citrix NetScaler. These are the most important:
- Load Balancing
- Content Switching
- High Availability
- Gateway, SSL VPN
- SSL Offload
- TriScale (Clustering)
- Global Server Load Balancing
- Application Firewall
Platforms
There are multiple NetScaler platforms:
- MPX: physical Netscaler appliance
- VPX: virtual Netscaler appliance available on VMware ESX, Microsoft Hyper-V and XenServer hypervisors
- SDX: advanced hardware based Citrix hypervisor to run multiple Netscaler VPX instances on a single hardware appliance
- Cloud: AWS and Azure
In the lab, we are going to work with NetScaler VPX on top of Microsoft Hyper-V.
Editions
Citrix NetScaler is available in three different editions:
- Platinum
- Enterprise
- Standard
Detailed features on these three different editions are available here:
https://www.citrix.com/products/netscaler-application-delivery-controller/buy/editions.html
Access
NetScaler has both a command line interface (CLI) and a graphical user interface (GUI).
NetScaler Architecture
Schema
The NetScaler appliance uses different IP addresses for management and connections.

These IP addresses are:
- NSIP (NetScaler IP)
- SNIP (Subnet IP)
- MIP (Mapped IP)
- VIP (Virtual IP)
We will review their roles in this article.
Topologies
You can deploy NetScaler in multiple topologies, below are two of the most used:
- One arm
In one arm mode, only one network interface is connected to an Ethernet segment, and the NetScaler does not isolate the clients and the servers.

- Two arm
In two arm mode, multiple network interfaces are connected to different Ethernet segments, and the NetScaler is placed between the clients and the servers.

NSIP
The NetScaler IP (NSIP) is the primary IP for the management of the appliance. That is the first IP address you must configure on the NetScaler.
The NSIP is used for internal Netscaler communication in HA deployment. In that case, the NSIP is the only IP enabled on the secondary NetScaler.
Reboot is required when changing the NSIP.
Configure NetScaler
|
1 |
config ns |
Change NSIP
|
1 |
set ns config -IPAddress <IP> -netmask <SubnetMask> |
SNIP
The Subnet IP (SNIP) is used for server side communication and is also known as Interface IP.
You should configure a new SNIP address for each subnet you want the NetScaler to be directly connected to.
When the SNIP is added in the NetScaler configuration, the appliance will automatically add a static route entry into the NetScaler routing table to identify that SNIP as the default entry point for that subnet.
The NetScaler has a mode named USNIP (Use SNIP), which is enabled by default. This will configure the NSIP address as the source IP address when sending packets from the NetScaler to the internal network.
There is another mode named USIP (Use SourceIP), which is not enabled by default. This mode will configure the client IP as the source IP address when sending packets from the netscaler to the internal network.
NetScaler will use round-robin if multiple SNIPs are configured in the same subnet.
Create SNIP
|
1 |
add ns ip <IP> <MASK> -type SNIP -mgmtaccess <ENABLED/DISABLED> |
MIP
A Mapped IP address (MIP) is similar to a SNIP address and is also used for server-side communication.
The difference is that by default, NetScaler will use a SNIP address to communicate with a subnet.
If there is no SNIP available or if USNIP is disabled, it will use a MIP address.
Create MIP
|
1 |
add ns ip <IP> <MASK> -type MIP -mgmtaccess <ENABLED/DISABLED> |
VIP
A Virtual IP (VIP) is the IP address of a virtual server that the end users will connect to. You can host the same VIP on multiple Netscaler instances.
Create VIP
|
1 |
add ns ip <IP> <MASK> -type VIP -arp <ENABLED/DISABLED> -icmpresponse <NONE/ONE_SERVER/ALL_SERVER/VSVR_CNTRLD> |
Interfaces
Netscaler interfaces are represented as <slot>/<port>.
Show Netscaler interfaces
|
1 |
show interfaces |
Enable / Disable an interface
|
1 |
enable interface <num> |
|
1 |
disable interface <num> |
Lab NetScaler Architecture
To start, we will setup two standalone netscalers as below:

At this time in the lab, both NetScalers are independent and manage different IP addresses (VIP, SNIP, MIP). They will each have one network adapter connected to the DMZ virtual switch previously created and one network adapter connected to the LAN virtual switch.
Download Netscaler VPX Hyper-V image
The first thing we need to do is download the binaries of Citrix NetScaler VPX.
Citrix provides images for all major Hypervisors (VMware, Hyper-v and XenServer).
The files are available on the following website:
https://www.citrix.com/downloads/netscaler-adc/virtual-appliances/netscaler-vpx-release-110.html
Note: you need to have a MyCitrix account with the proper permissions to download Netscaler VPX.
The version installed for this lab is NetScaler VPX for Hyper-V 11.0 Build 55.20 released on Jun 30, 2015.
Convert .VHD to .VHDX
Before creating the virtual machine, we need to convert the vhd disk to vhdx.


Copy Dynamic.vhd to D:\VM\NS01\NS01.VHD.
Open Hyper-V Manager and select Edit virtual Hard Disk on the right panel.
Enter the location of the vhd file: D:\VM\NS01\NS01.VHD.

Select Convert.

Select the VHDX format.

Select Dynamically expanding.

Enter the new location of the vhdx file: D:\VM\NS01\NS01.VHD.

Select Finish to start the process.
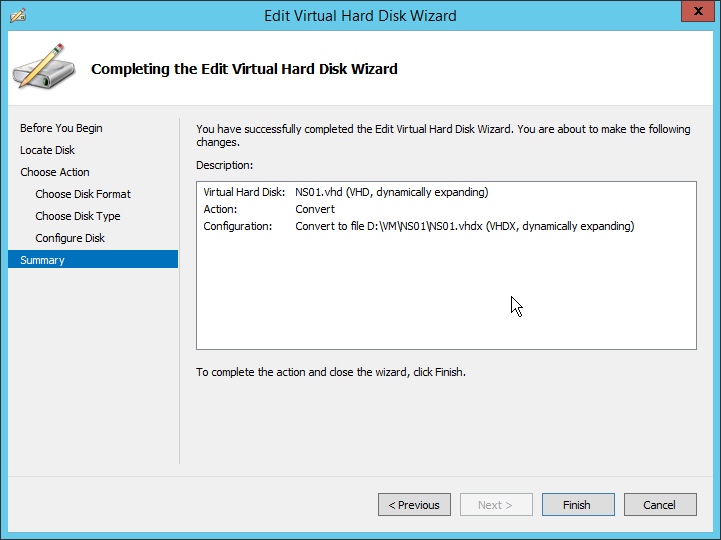
The new vhdx file is available.

Create the virtual machines within Hyper-V
The first step is to create the two virtual machines (NS01 and NS02).


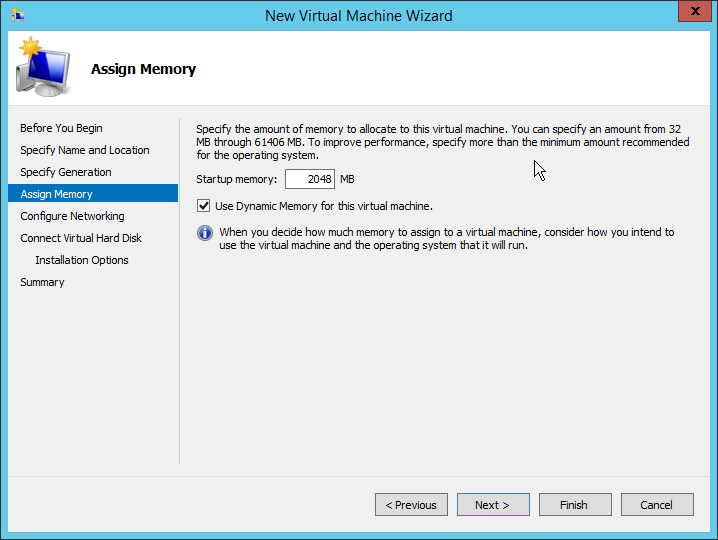

Select the disk previously created.

Select Finish to create the virtual machine.

Once the virtual machine is created, select Settings on the right and increase the number of virtual processors (2 VCPU are required).

Configure two network adapters as below.
Select Add Hardware -> Network Adapter to create the missing adapter.


Repeat the same configuration for the NS02 virtual machine.
Netscaler basic configuration
Configure NetScaler IP addresses
Boot NS01.
After few minutes, enter the Nescaler IP (NSIP). The IP address you want to use to connect to the Netscaler administration page.

Netscaler will automatically assign this IP to the first network adapter. It is mandatory to assign a NSIP when setting up and configuring the NetScaler for the first time. Only one NSIP address is allowed, cannot be removed and you have to reboot the Netscaler when you change it.
Then enter the subnet mask.

And the gateway. (the IP of the Verizon FIOS router in my case)

Repeat the same configuration with NS02.
Configuration:
NS01: 192.168.1.100
NS02: 192.168.1.200
Connect to NetScaler with the GUI
Open a browser, and type 192.168.1.100.
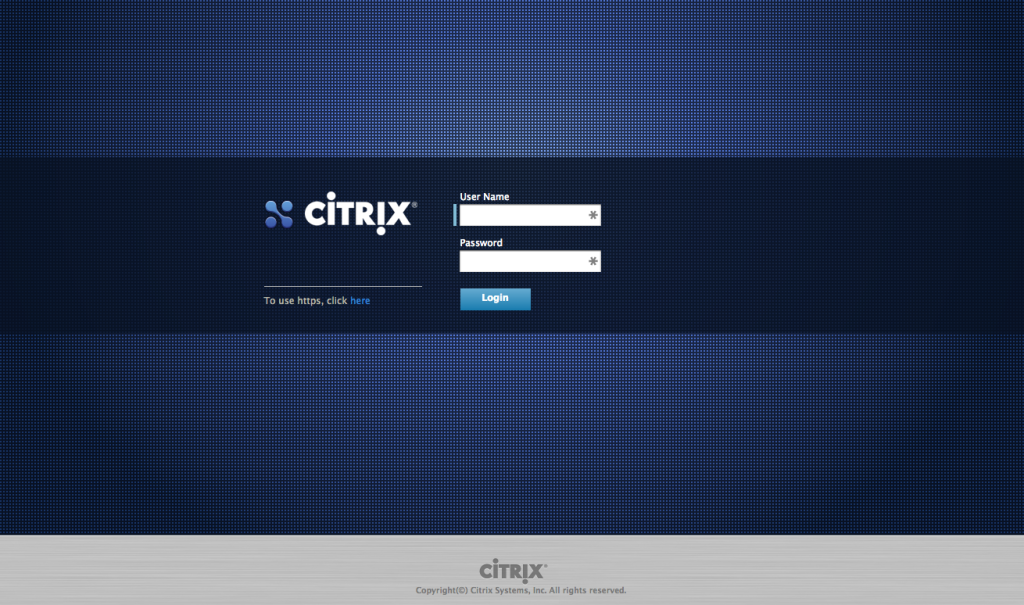
The default credentials are:
Login: nsroot
Password: nsroot
Change the NS IP using the GUI

Reboot NS01.
Configuration:
NS01: 192.168.1.199
NS02: 192.168.1.200
Configure SNIP

NS01 Subnet IP : 10.0.0.1
NS02 Subnet IP : 10.0.0.2
SNIPs are also known as interface IPs. Every interface plugged into the NetScaler needs a SNIP associated with it.

Netscaler will automatically assign this IP to the second network adapter (LAN).
Configure DNS
The next step is to configure the name of the appliance and the DNS server. The name of the first NetScaler is NS01. At this time I don’t have any but I already know that the DNS server will have the following IP:
10.0.0.10

Install NetScaler license
The next step is to install the license. You must install a proper license before you can deploy the appliance to optimize and distribute the network traffic.

Select Upload license files from a local computer and browse to your license file.

NS01 is installed.

The next step here is to check the features enabled with the license.

Almost all features are available with my License. My only limitation is the number of Netscaler gateway sessions (5 SSL VPN sessions max).
Additional configuration
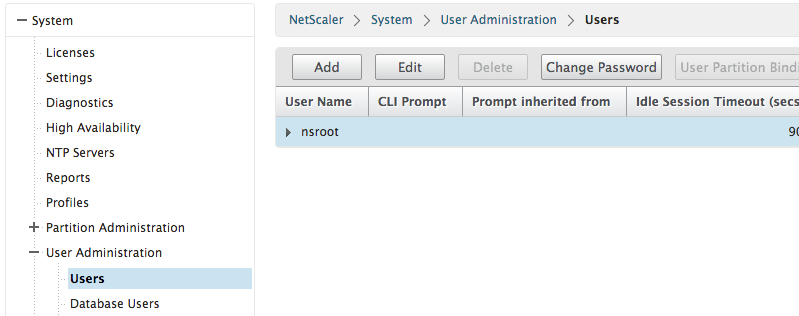
Change NetScaler NSROOT password
Citrix recommends to change the default NSROOT password.
Go to System -> User Administration and Users. Select NSROOT and select Change password.

Repeat the process with NS02 (NSIP 192.169.1.200 and Subnet IP 10.0.0.2).
Connect to NetScaler with the CLI
By default, SSH is enabled on the NSIP.
In this lab, I am using MobaXterm for my terminal sessions.


Transfer data to and from a NetScaler
You can also connect to the appliances using the SFTP protocol.
For example with WINSCP:

 SFTP – NetScaler – Step 03

In the next post, we will configure our two Netscaler appliances as an High Availability pair (HA pair).
More from the Lab!
- Building a Dual-Xeon Citrix Lab: Part 1 – Considerations
- Building a Dual-Xeon Citrix Lab: Part 2 – Hardware
- Building a Dual-Xeon Citrix Lab: Part 3 – Windows and Hyper-V installation
- Lab: Part 4 – Hyper-V Networking
- Lab: Part 5 – NetScaler 11 Architecture and Installation
- Lab: Part 6 – Configure NetScaler 11 High Availability (HA Pair)
- Lab: Part 7 – Upgrade NetScalers in HA
- Lab: Part 8 – Save, Backup and Restore NetScaler 11 configuration
- Lab: Part 9 – Install Microsoft SQL Server 2014 (Dedicated)
- Lab: Part 10 – Citrix Licensing demystified
- Lab: Part 11 – Install XenDesktop 7.6
- Lab: Part 12 – Setup NetScaler 11 Clustering (TriScale)
- Lab: Part 13 – Configure Published Applications with XenDesktop 7.6
- Lab: Part 14 – Citrix StoreFront 3.x
- Lab: Part 15 – Configure SSL in StoreFront
- Lab: Part 16 – StoreFront load balancing with NetScaler (Internal)
- Lab: Part 17 – Optimize and secure StoreFront load balancing with NetScaler (Internal)
- Lab: Part 18 – Secure LDAP (LDAPS) load balancing with Citrix NetScaler 11
- Lab: Part 19 – Configure Active Directory authentication(LDAP) with Citrix NetScaler 11
- Lab: Part 20 – RDP Proxy with NetScaler Unified Gateway 11
- Lab: Part 21 – Secure SSH Authentication with NetScaler (public-private key pair)
- Lab: Part 22 – Ultimate StoreFront 3 customization guide
- Lab: Part 23 – Securing Citrix StoreFront DMZ deployment
- Lab: Part 25 – Upgrade to Citrix StoreFront 3.7
- Lab: Part 26 – Install/Upgrade Citrix XenDesktop 7.11
- Lab: Part 27 – Getting started with Microsoft Azure
- Lab: Part 28 – Getting started with Citrix Cloud
- Lab: Part 29 – Configure XenDesktop And XenApp Service with Microsoft Azure and Citrix Cloud
- Lab: Part 30 – Configure Identity and Access Management in Citrix Cloud with Microsoft Azure AD
- Lab: Part 31 – Configure NetScaler Gateway Service for XenApp and XenDesktop Service in Citrix Cloud
- Lab: Part 32 – Configure MCS with XenDesktop and XenApp Service in Citrix Cloud
- Lab: Part 33 – Configure Azure Quick Deploy with XenDesktop and XenApp Service in Citrix Cloud
- Lab: Part 34 – Configure Site Aggregation for Citrix Workspace in Citrix Cloud with XenDesktop 7.x located on-premises
- Lab: Part 35 – Configure a Hybrid NetScaler MA Service environment in Citrix Cloud
- Lab: Part 36 – Configure ShareFile in Citrix Cloud with StorageZones on-premises
- Lab: Part 37 – Upgrade NetScaler HA pair with NetScaler MA Service in Citrix Cloud
- Lab: Part 38 – How to Configure Full VPN Setup with Citrix NetScaler in CLI
- Lab: Part 39 – Configure Multi-Factor Authentication with Azure MFA Service and Citrix Workspace
- Lab: Part 40 – Getting Started with Citrix App Layering
- Lab: Part 41 – Configure Citrix App Layering
- Lab: Part 42 – OS Layer with Citrix App Layering
- Lab: Part 43 – Platform Layer with Citrix App Layering
- Lab: Part 44 – Application Layers with Citrix App Layering
- Lab: Part 45 – Layered Image Deployment with Citrix App Layering
- Lab: Part 46 – Elastic deployment with Citrix App Layering
- Lab: Part 47 – User Layers with Citrix App Layering
- Lab: Part 48 – Windows 10 and PVS with Citrix App Layering


your setup netscaler very nice and easy, but I think a lot of people would love to see you can show how setup and config how from internal connect to outside world.
Hello
I love your blog
I just have an issue
I build a very simple lab
Only one vswith on HV ( not very nice but only for lab demo)
2 NS 192.168.1.20/21
snip in ha mode 192.168.1.30
MBF one
I have 2 dc (192.168.1.100/101) and 3 web sites
I’m actually building a test lab for demo one of my customer
for netscaler gtw
I created a UNIFIED GATeway (I have try license platinum) with ssl cert 🙂
I created a VIP 172.16.0.11
I created a windows 7 vm with the netscaler plugin
I connect to my vip
When i select vpn access (not clientLess) all ok
I have the default page but I cannot access to any ressources
I created a session policy with split dns off so I dont have to create applications
I cannot rdp or ping
do you have a idear